Alcove Arcadium
Winter 2022
A retro-gaming cabinet with a budget.
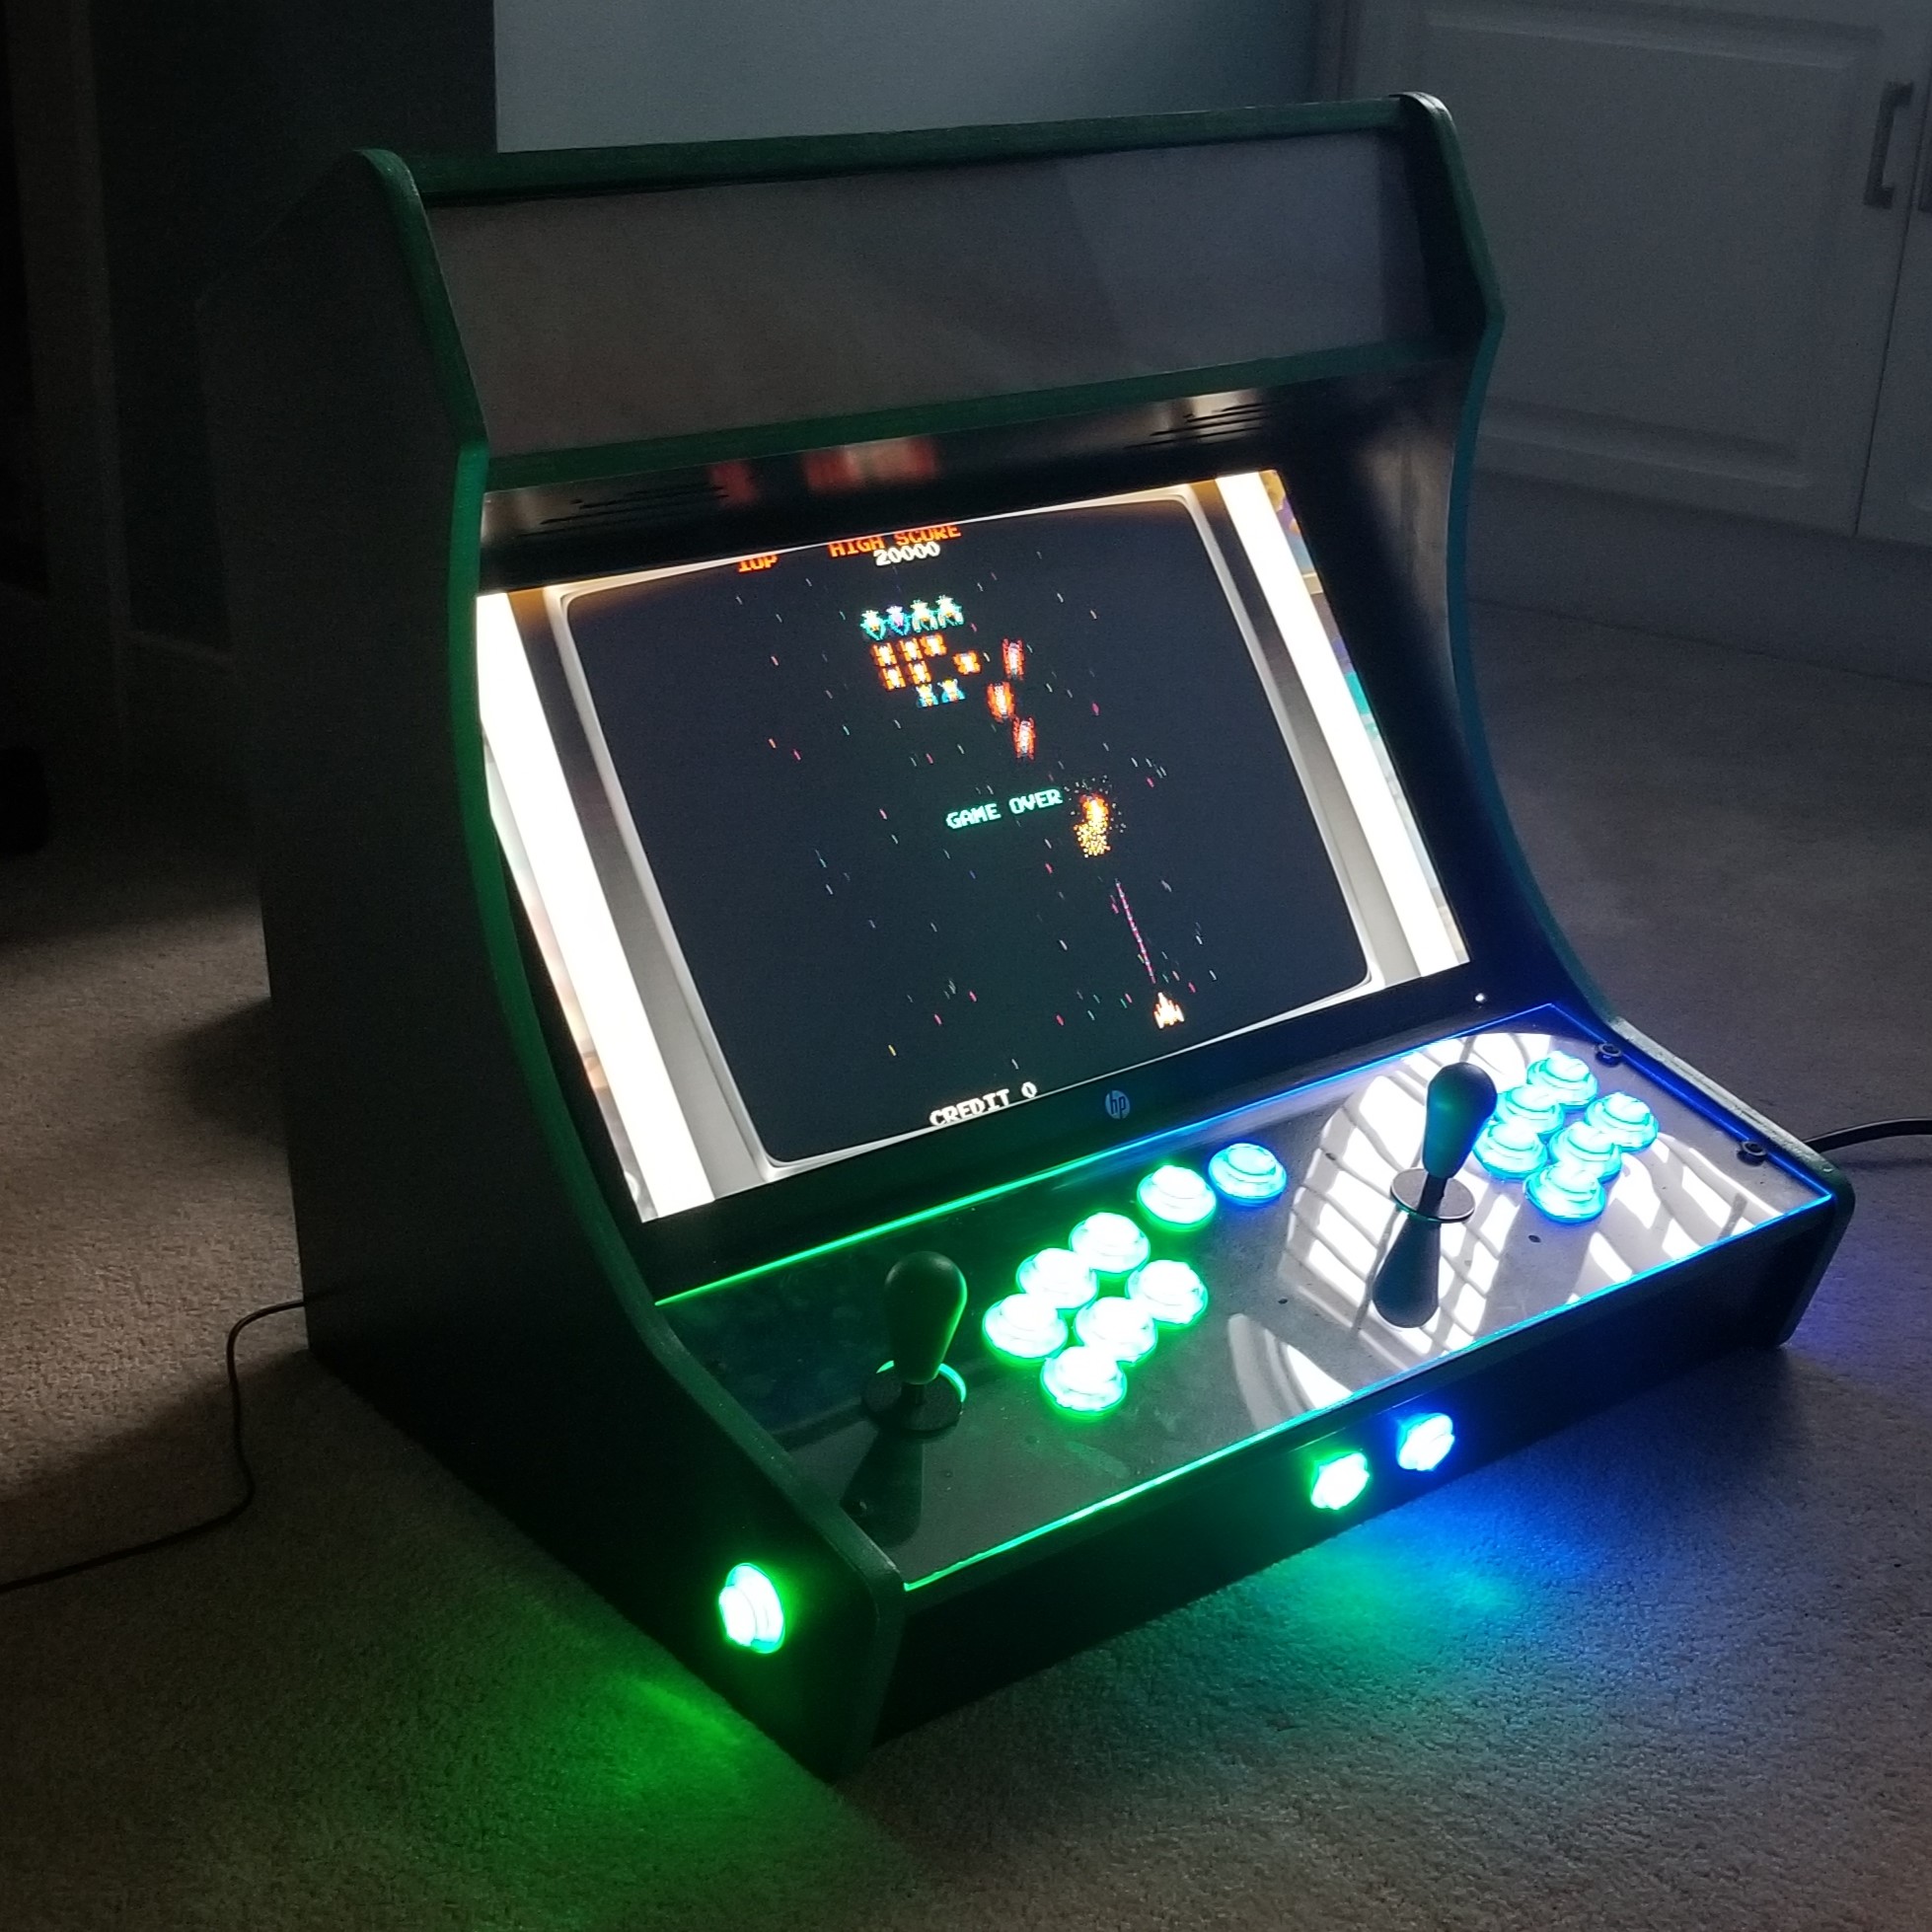
Overview
While this may seem to be purely a passion project of mine, I do believe there are some nuances here that stretch into the technical field. To begin, I am a huge retro gamer and a fan of video games prior to the current century (80s and 90s), even though I didn't live long in it. I even have a retro game and console collection spanning the NES, SNES, GameBoy, Sega Genesis and N64, which I plan to continue to foster.
If I could, I would own a bunch of arcade cabinets if they weren't too pricy or took up much space. This left me pondering if there was an alternative that fit this criteria allowing me to get the arcade gaming experience . . .
A Goal & Budget Challenge
I did some research and talked to some of my friends/relatives with experience emulating machines, and found that bartop arcade machines could be what I'm looking for. It would fit in my living room no problem and I could set it on top of a table if I wanted to mess around and play some games on it. I liked the idea of personalizing my own system and tackling the build myself. I had played with gaming emulators before, but had not thought about the hardware and device too much to make it seem much more like the real deal. I also wanted it to be on a budget.
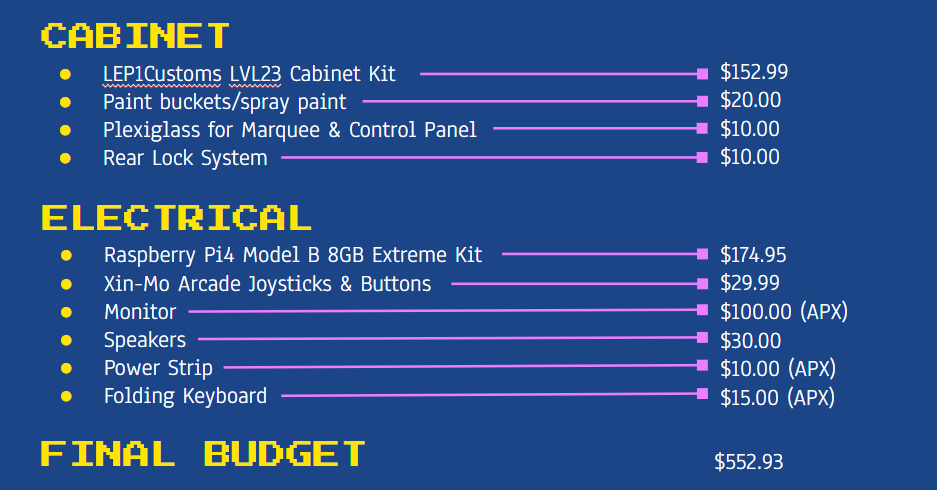
Without myself being a woodworker, I took some liberties and resorted to the internet to find a wooden kit case for my machine build. I found some pretty good wooden kits online to make the machine and landed on one that was carved for a two player fighting bartop machine. If I got a machine that was set-up to handle games like Street Fighter and Mortal Kombat, it would be able to support most games with the number of buttons and layout scheme, except some game like Tron with unqiue controls (that you need a trackball for). Secondly, I found an unused monitor lying around in my parents' attic that they were willing to let me use. I was also able to use an extension cord I had bought a little while back, to use for the power supply. I bought some cans of spray paint to paint the casing. I chose to buy online a Raspberry Pi, and some LED buttons and joysticks. Originally, I planned to purchase a Raspberry Pi because I thought it would be the cheapest and smallest computer to put into the machine. I ended up splurging a little on my RaspPi to get a good model of, but definitely could have bought an older version for much less. Some other last purchases include a speaker, some items to build a lock for the backside (thought this made the case feel a little more official), and a folding keyboard (for convenience in easy configurations directly into my RaspPi's Batocera image). Ultimately, I was able to build the machine for a tad under $450, which I thought was well worth the value. Eventually, I plan to buy decals and deck out the marquise for the cabinet.

Adding Some Flare
I made the decal and marquise designs to include a conglomerate of retro gaming characters and items. I created it in the style of the arcade artwork you would see on the side of arcade games in the 80s/90s and drew it in Adobe Photoshop CC.
Software & Technical Aspects
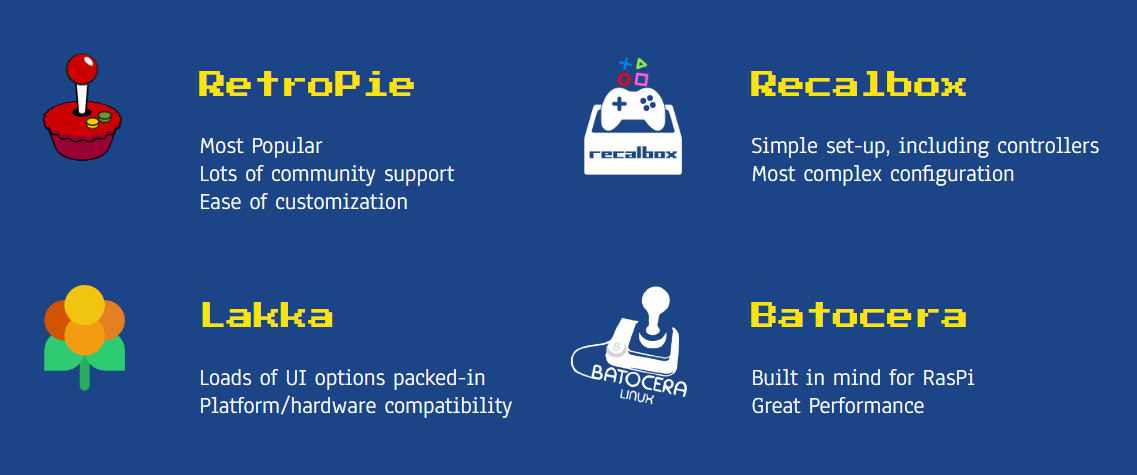
As far as software for the cabinet, I had a handful of gaming distro contenders to choose from to put on my Raspberry Pi. I ended up landing on putting an image of the gaming OS (Operating System), Batocera.linux, on my Raspberry Pi 4. I made a couple changes to the Batocera box and SSHed (remotely login using the Secure Shell protocol) into the device from Fedora on my ThinkPad laptop. I attempted to put a bunch of games on the machine through this remote SSH connection as well, but found the process really dragged. I ended up just choosing to take out the SSD card from my Raspberry Pi and dropping in ROMs manually. I ended up adding velcro to the inside of my box to hold the Raspberry Pi, original plan was more permanent, giving me better accessiblity to the SD card for frequent changes from inside the machine.
I could see myself returning back to remotely connect to the device with SSH to make new configurations or add a new and improved splashscreen, but for now I'll stick to my manual process of dropping games into the SD Card.


The Build
I recorded some weekly progress in the screenshots to show how I built the machine.
I started by spraying the wooden panels of the wooden kit with some spray paint cans. I chose a black casing with green edge accents for the color scheme. It took at least five layers of black to get it to look pure dark. To avoid making the green dark, I put Painter's Tape to preserve the color.
Once finished painting, I assembled the pieces with superglue. I mounted the monitor screen onto a board that was included in the kit and it just barely fit at a 15 inch diameter - I lucked out here having not measured beforehand. I ended up placing plexiglass over the marquis and control pad to make things look a little more official.
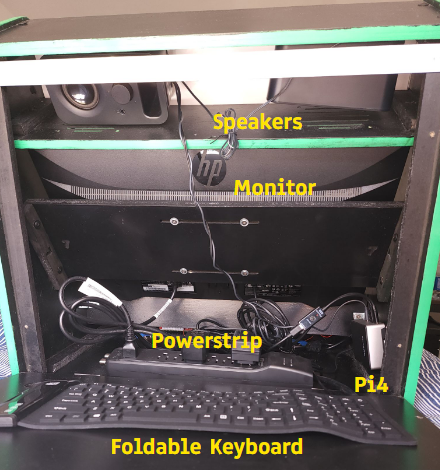
After the main assembly of pieces I wired the buttons and joysticks in place. This required a bit of soldering to connect the electrical work to the button control panel. I ended up having to drill the holes a little larger to fit the buttons and joysticks into the kits control pad. During the wiring process I had also realized I had mixed up some of the player 1 and player 2 buttons and had to redo the process.
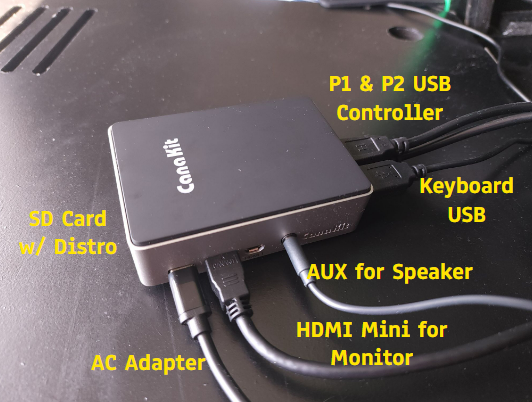
After a few setbacks with getting the buttons in place, I set up the Raspberry Pi. I installed Batocera onto the SD Card and plugged in the monitor in the Raspberry Pi, this had also required I use an adapter for the device to convert from VGA to HDMI Mini, HDMI to HDMI Mini or DisplayPort to HMDI Mini. I started with VGA and could not get the screen to show. I ended up resorting to the option of DisplayPort to HDMI Mini and this worked flawlessly. I'm guessing the Raspberry Pi needed better performance for the screen to get it to work properly and Display Port did it. After that process I was able to get the arcade machine running smoothly.
This project took two to three weeks throughout the whole process of assembly and installation.
The Outcome
My passion for retro video games and having some relatives that also enjoy retro games inspired me to make this machine. While I do enjoy exploring the last living arcades across the country, I can now enjoy a similar experience from the comfort of my apartment. I've got a bunch of games at my disposal now without the need to insert any coins. The machine doesn't have the same ringing of the quarters, and atmosphere of a bunch of machines making beeps at the same time, but for now this will do.